Monthly Archives: June 2013

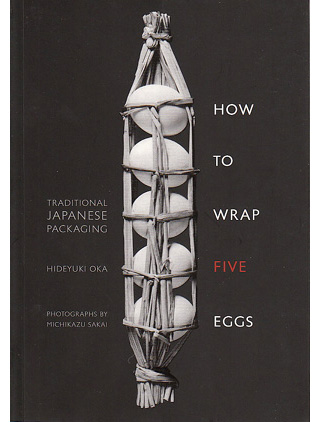
How to Wrap Five Eggs: a designer’s must-have

How to Wrap Five Eggs - Traditional Japanese Packaging, by Hideyuki Oka. Photographs by Michikazu Sakai.

How to Wrap Five Eggs – Traditional Japanese Packaging, by Hideyuki Oka. Photographs by Michikazu Sakai.

For years, I lugged around a dog-eared copy of “How to Wrap Five Eggs”, a coffee-table size book from my local library. Knowing that it was both out of print and unaffordable, I made dozens of drawings from the gorgeous black and white illustrations so that I could revisit them and mine them for ideas later (until I had received too many angry reminders from the library, and had to reluctantly return the book). I found everything I was looking for, and much more: timeless designs, both practical and beautiful.

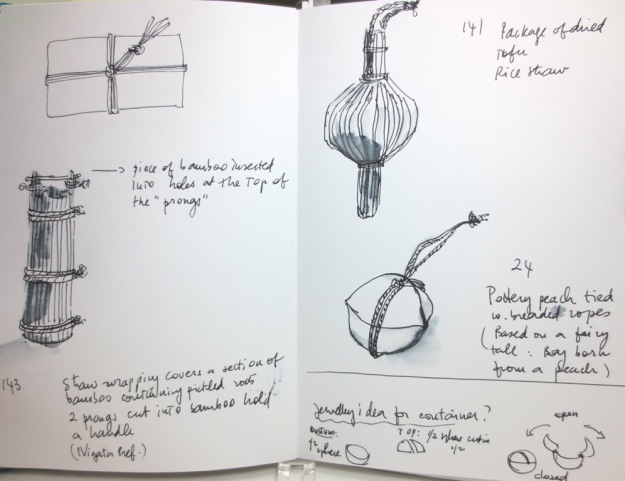
Drawings based on How to Wrap Five Eggs.

My sketchbook. Drawings based on How to Wrap Five Eggs.

Hideyuki Oka (1905-1995), a renowned Japanese graphic designer, collected traditional Japanese packaging and his collections were regularly exhibited around the world. A book featuring over 200 traditional objects from his collection, with illustrations by Michikazu Sakai, and commentaries by Oka, was published in 1967. A second edition came out in 1975 under the title “How to Wrap Five More Eggs”. These are pricey, oversized books, with gorgeous black and white photographs, that, as I said, are unfortunately out of print. However, in 2008, Shambhala Publications reissued the second book inexplicably under the title of the first book “How to Wrap Five Eggs”. As a paperback, it is now quite affordable, and also, thankfully, much easier to lug around!

When searching for inspiration and new ideas, I always prefer to look at other mediums. By avoiding jewellery, I am more likely to come up with less predictable, fresher ideas. Also, I find that most design solutions can be translated from one medium to another. This book is an excellent tool for the design process. It shows what makes a “good” design – a balanced relationship between beauty and function.

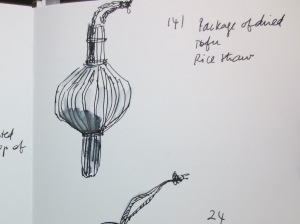
Drawing based on How to Wrap Five Eggs page 137

Drawing based on How to Wrap Five Eggs, p 137.

(Above) A package of dried tofu slices made of rice straw. It reminds me of the lavender potpourris my grandmother would make every year at the end of the summer. The bundle of long-stemmed flowers was tied tightly together, then bent onto itself to keep the flowers on the inside. A silk ribbon was threaded through to keep it from breaking and spilling its contents on the linens. Simple, but effective.

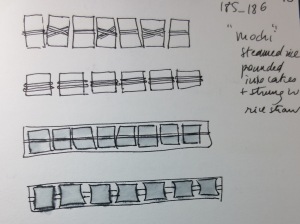
Drawing 2 (185-186) 160-161

Drawing based on How to Wrap Five Eggs, p 160-161

(Above) Tofu and “mochi” (steamed rice) pounded into cakes and strung with rice straw. Can be hung from the ceiling and used as needed. Ordinary, everyday products are beautifully and elegantly packaged. The strong graphic lines of the straw create a very pleasing rhythmical pattern.

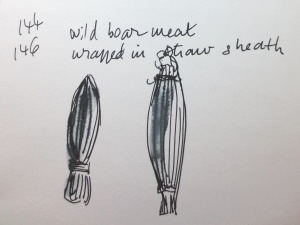
Drawing based on How to Wrap Five Eggs, p 138-139

Drawing based on How to Wrap Five Eggs, p 138-139.

(Above) Basic packages made from natural materials and designed to carry, store and preserve various food items. Palm leaf, and a sheath of straw.

Drawing based on How to Wrap Five Eggs, p 150.

Drawing based on How to Wrap Five Eggs, p 150.

(Above) Sampling of food from a restaurant in Tokyo wrapped in an unadorned package – except for the elaborate knots of the straw rope. This was meant to be given as a gift. It is quite understated, but done with great care and consideration. According to Oka, “What is the use of a package if it shows no feeling?”

Drawing based on How to Wrap Five Eggs, p 138.

Drawing based on How to Wrap Five Eggs, p 138.

(Above) A section of bamboo covered with straw, used as a container for pickled roots of mountain burdock. Rustic looking, but its shape is perfectly suited for the long roots of burdock. The handle is a small piece of bamboo inserted into holes pierced into two prongs protruding from the bamboo tube – a simple, but elegant solution that could be easily translated into metal.

Drawing after How to Wrap Five Eggs, p 35.

Drawing based on How to Wrap Five Eggs, p 35.

(Above) Container for candies, from Okayama Prefecture. Pottery in the shape of a peach tied with braided ropes. The design is based on the fairy tale of Momotaro, the boy born from a peach. The bottom part of the container is a half-sphere; the top is made of two domed sections. This is another design that could be adapted to metalwork, for a small locket or a larger scale vessel, with a lid articulated on hinges.

What I have presented in this post is a small sampling of what can be found in Oka’s book. In this selection, I chose to focus mostly on simple packages made with everyday natural materials, whatever was at hand, like straw, leaves and bamboo. “How to Wrap Five Eggs” offers many more examples of wrappers, boxes, baskets and various containers, some more intricate or less rustic, and using clay, paper, wood or fabric. Regardless of the choice of materials, no matter how humble they might be, the craftsmanship is always exquisite; whatever the technique (ceramics, wood carving, basketry, etc.), every piece shows a careful attention for the simplest of details, as well as ingenuity and creativity. These are valuable lessons on how to apply smart, elegant solutions to design challenges; timeless in that they can still be applied today, even with modern materials.

I will leave you with one final quote by Hideyuki Oka : “… what we have lost for sure is what this book is about: a once-common sense of fitness in the relationships between hand, material, use, and shape, and above all, a sense of delight in the look and feel of very ordinary, humble things.”

“How to Wrap Five Eggs – Traditional Japanese Packaging”

By Hideyuki Oka. Photographs by Michikazu Sakai. Weatherhill, an imprint of Shamhala Publications, Inc., 2008. ISBN 978-1-59030-619-2

Shop Secrets Revealed – #1 Masking Tape

Copy of DSCF7250

In life, as in jewellery making, there are things that you can’t always learn from books or from taking a class; practical things like how to remove a broken drill bit stuck in a piece of metal, shortcuts to help you work more efficiently, time-saving tips, and tricks of the trade. These are things you learn from other people; people who have a lot of experience in the trade, people in the trenches. Of course, you could also find out these things eventually through trial and error – well, error, mostly.

Something I wish I could ask all the goldsmiths out there is: What are your favorite tools or pieces of equipment and why? There is a lot to be learned that way, and not just in relationship to their work, but about new and better ways of using these tools as well.

This is the first of a series of posts where I’ll be sharing my favourite tools and tips with you, and I look forward to hearing from all of you as well. What are your favourite tools, and what “life-saving” tips do you know that you could share?

High on my list of the must-have tools in the studio is masking tape. I have several rolls in different parts of my studio placed in strategic places. There is a roll on my bench, always within easy reach. Masking tape has gotten me out of several tricky “sticky” situations and has saved me a lot of time and frustration.

Something masking tape is good for, of course, is … masking.

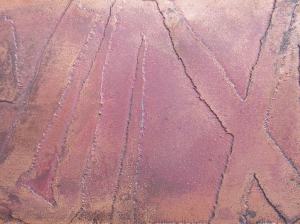
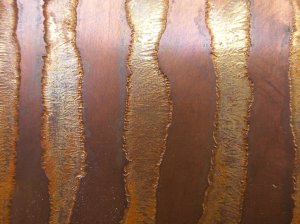
In preparation for etching, cover the parts of your design that you want to “keep”; masking tape acts as “resist” and protects the metal from being eaten away by the chemicals. This works well when etching copper or brass with ferric chloride.

D Brechault 7280

On the finished piece, the areas that were covered with masking tape are smooth and slightly raised; all the recessed areas of the design have been etched. They show a beautiful texture, especially around the edges of the masked parts.

D Brechault 7273

Etched copper with patina.

Pieces of tape can be torn by hand or specific shapes can be cut out with scissors. You can see here how this produces different results. With torn pieces of tape, there is a more pronounced texture (“pull lines”) around the edges, whereas with the cut pieces, the etch is cleaner and sharper around the shapes.

More pronounced texture, with "pull lines".

More pronounced texture, with “pull lines”.

Cleaner, sharper lines around the edges.

Cleaner, sharper lines around the edges.

The same masking technique can be used for sandblasting as well. After finishing and polishing your piece, cover the parts of your design that need to remain smooth and polished. Whatever is left exposed will have a lightly textured and matte surface after sandblasting. For heavy sandblasting, duct tape or electrical tape might be more suitable, but I find that masking tape is sufficient for standard results.

The exposed areas are textured; the masked areas remain untouched.

The exposed areas are textured; the masked areas remain untouched.

It’s great for covering or protecting various surfaces.

Since rivets are put in and set after a piece has been finished and polished, it helps to protect the area around the rivets to prevent damaging the surface of the metal when tapping them in with the riveting hammer.

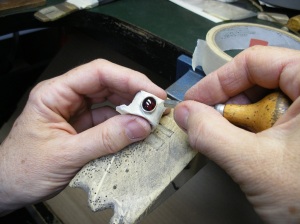
No matter how careful you are when setting a stone, accidents happen! To be safe and to protect your newly finished piece from scratches, cover with masking tape.

Setting a stone.

Setting a stone.

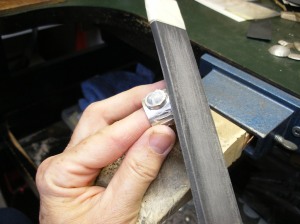
Cover a stone that’s already set, if you need to do some more cleaning around the setting.

Sanding around a setting.

Sanding around a setting.

You can use it to tape together a stack of sheets of metal.

This is useful when you need to drill through several sheets and make sure all the holes are perfectly lined up (for riveting for example).

Masking tape wrapped around 3 sheets of metal in preparation for drilling.

Masking tape wrapped around 3 sheets of metal in preparation for drilling.

Masking tape is quite sticky and can be used to make “handles”.

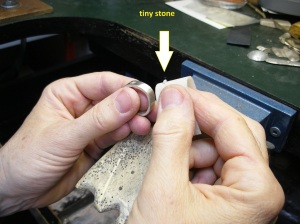
Use them to hold things that are very small, difficult to hold or slippery (like stones). With a “handle” it’s easier to put a stone in a setting, and take it out, to check whether it fits or it is level.

D Brechault  7257

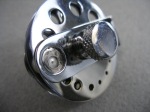
To drill pearls. A pearl drilling vise is not really practical, because the pearl tends to slip out and worse, the tool can damage the delicate surface of the pearl.

Holding a pearl with a masking tape "handle" to drill it.

Holding a pearl with a masking tape “handle” to drill it.

Pearl drilling vise.

Pearl drilling vise.

D Brechault 7285

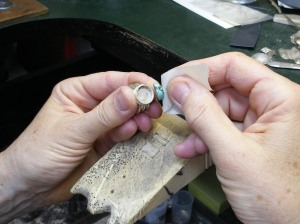
Life-saver. A piece of masking tape can be used to pull a stone out of a tight setting (works most of the time – more tips later on what to do when the stone is really stuck).

Pulling a stone out of a setting.

Pulling a stone out of a setting.

Finally…

Some people prefer duct tape. Yes, it is tougher and stickier, but I find that it tends to leave behind too much of a sticky residue once removed. Other people swear by green tape or painter’s tape. I find it not quite sticky enough and sometimes too flimsy.

To each her own.

Oh, and one more thing!

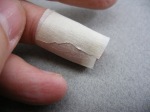
When a bandage is not available, guess what I reach for?

Copy of DSCF7287

Note: The idea for this blog post comes from Secret Shop Weapons, a book recently published by MJSA Press.