Action!


Jackson Pollock - photo by Hans Namuth

Jackson Pollock – photo by Hans Namuth

Lately I have felt the need to reconnect with less traditional techniques, and to be a bit more spontaneous in my approach. In my “side-gig” as an art history instructor in our Jewellery Programme, I had been looking at the work of the Abstract Expressionists, namely Jackson Pollock. The photographs and film of the painter shot by Hans Namuth in the early ‘50s show Pollock at work. In these iconic images, Pollock is seen moving about the large canvas laid on the floor, leaping and dripping or throwing paint right from the can. He appears to be totally immersed in the act of painting, an intense, gestural process; at some point, saying: “A painting has a life of its own; I let it live”. I watched this clip over and over again and knew that I wanted to work in a more instinctive manner, to respond to the metal as it moves and shifts, to be more engaged with it. I needed to put the “action” back into my work. I should also mention the paint-splattered shoes and the dangling cigarette, oooh, so cool. I wanted that too, or whatever the equivalent is for a goldsmith (minus the cigarette, of course).

Jackson Pollock - photo by Rudy Burckardt, 1950 - Smithonian Institution

Jackson Pollock – photo by Rudy Burckardt, 1950 – Smithonian Institution

Taking Pollock and the Action Painters, and their direct and immediate approach to painting as a point of departure, I decided to tackle a series of brooches (brooches, being less constraining and offering a larger “canvas” so to speak). I would riff on a few abstract shapes and create three-dimensional forms based on them. Copper, a very ductile and malleable metal, was the perfect candidate. It also lends itself well to patinas and will take on rich colours, sometimes even quite painterly.


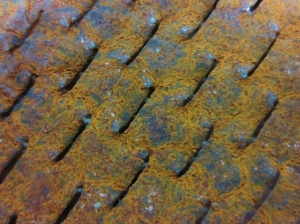
Detail of patina on corrugated copper.

Detail of patina on corrugated copper.


Bonny Doon Engineering micro-fold brake #115090

Bonny Doon Engineering micro-fold brake #115090

Using corrugation and fold-forming, techniques that are fairly quick and hands-on, I was able to shape the sheets of metal rapidly, in a gestural and energetic manner. I recommend Patricia McAleer’s book Metal Corrugation, Surface Embellishment and Element Formation for the Metalsmith, 2002, Out of the Blue Studio (ISBN: 0-9715242-0-3), a very thorough and handy manual on corrugation. Fold-forming, a technique developed by Charles Lewton-Brain (several excellent publications available, see: Brain Press Publications) is a process that is both technical and playful, where the material is folded and unfolded repeatedly to form three-dimensional structures. Both techniques only require a few tools and simple equipment. For corrugation, I used the Bonny Doon Engineering micro-fold brake #115090 (available at riogrande.com). Fold-forming does not require any special equipment other than a rolling mill. Free tutorials are available on ganoksin.com.


D.Brechault, Crane No 6. copper, heat patina; corrugation, fold-forming

D.Brechault, Crane No. 6, brooch, copper, heat patina; corrugation, fold-forming


D. Brechault, Pod No 3, brooch, copper, heat patina; corrugation, fold-forming.

D. Brechault, Pod No. 3, brooch, copper, heat patina; corrugation, fold-forming.

D. Brechault, Zip No. 5, brooch, copper, heat patina,; corrugation, fold-forming.

D. Brechault, Zip No. 5, brooch, copper, heat patina; corrugation, fold-forming.

So, this is what I have been doing so far: These brooches are a sampling of a series of impromptu sketches or studies in metal. Rather than cleaning the metal by pickling it after annealing and soldering, I have left it in its natural state, oxidised, covered with a patina of warm, earthy colours. For me, this is a bit like Pollock’s paint-splattered shoes – evidence of the process of working the metal.

Rolling, folding, unfolding, shaping. Action!

Pollock's shoes - photo courtesy Pollock - Krasner House & Study Center.

Pollock’s shoes – photo courtesy Pollock – Krasner House & Study Center.

Acknowledgements: Thank you for your research, Andrew!


The I Ching of the Goldsmith

Hexagram Qian: "Force", also: "The Creative Heaven", from the I Ching.  From top: mandrel, hand forged setting tool, dapping punch, square needle file, hand forged setting tool, hand forged repoussé tool

Hexagram Qian: “Force”, also: “The Creative Heaven”, from the I Ching.
From top: mandrel, hand forged setting tool, dapping punch, square needle file, hand forged setting tool, hand forged repoussé tool

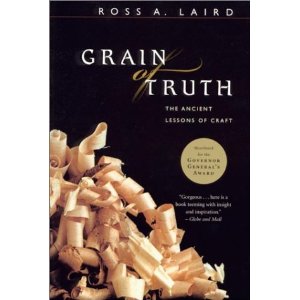
The holidays at last! Time to unwind and have fun. My idea of a good time is reading a book, and for this, I chose Grain of Truth – The Ancient Lessons of Craft, by Ross A. Laird, a book I had read and enjoyed over a decade ago. Guaranteed gratification? Yes, and why not? It is the holidays after all.

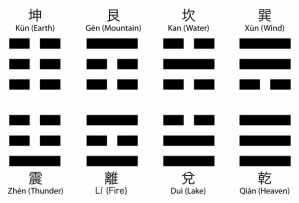
In “Grain of Truth”, the author takes us through the process of designing and making a series of woodworking projects. This is not, however, a technical manual or a how-to book (although it is kind of, but in a poetic sense). Organized in eight chapters named after the eight trigrams of the I Ching (Earth, Water, Fire, etc.), and each dedicated to a different project, it flows elegantly and seemingly without effort from chapter to chapter. We follow the maker as he experiences joy and satisfaction or doubt and frustration. And although it deals with woodworking projects, it is quite universal and will resonate with any craftsperson, whatever their craft may be.

Trigrams of the I Ching

Trigrams of the I Ching

The book celebrates the importance of craftsmanship, the beauty of an object made by hand, but not in a sentimental way because, the “truth” is, this practice demands deep awareness and strict discipline. The process of creating and making something by hand, like meditation, requires us to pause and ponder often. “Working with hand tools”, says Laird, “teaches, in a pragmatic way, the art of stillness” (p. 28). When working with wood, or any other medium for that matter, one needs to be receptive, to watch and to listen. Observe the file as it glides on the edge of the sheet of metal. Hear the hammer as it hits the metal. When under pressure or facing deadlines, how many times have I felt the impulse to dominate the tools, to force them to perform a specific task? It is not, Laird adds, about will power, which will only bring disappointment and frustration. Instead, it “requires a purposeful surrender, a willingness to be taught by tools (…)” (p. 29).

This book, so full of wisdom, shows us that patience and humility, backed by concentration and deep knowledge of materials and techniques, will be rewarded with a sense of wonder. In the spirit of the Tao, Laird always starts afresh with each project, open to the possibilities and with “faith in the process and a willingness to be taken” (p. 50).

Happy holidays and best wishes to all for a creative New Year.

Ross A. Laird, Grain of Truth – The Ancient Lessons of Craft, Macfarlane Walter & Ross, Toronto, 2001. ISBN 1-55199-065-2

51RZ9Q3QKPL__SL500_AA300_


“Beyond the Precious” (searching for beauty in all the wrong places)


Automobile Junkyard on the North Bank of the Kansas River between the 12th and 18th street bridges. Kenneth Paik, 1973. Wikimedia Commons.

Automobile Junkyard on the North Bank of the Kansas River between the 12th and 18th street bridges. Kenneth Paik, 1973. Wikimedia Commons.

A few months ago, I wrote about the challenges of reconnecting with my creative side and working on three new pieces of jewellery I intended to submit to an exhibition. This post is a behind-the-scenes glimpse into my process and these challenges. Spoiler alert! I did meet the deadline and all three pieces were accepted in the show.

The first challenge was of my own making. I wanted to make rings; my previous projects had been mostly lockets and brooches, and I needed a change. Brooches would have been a more practical choice simply because they offer more space, a larger canvas so to speak, to express myself. But most of all, because brooches are not worn directly on the body, wearability issues are less constraining.

The theme of the show, “Beyond the Precious”, resonated with me because I had just seen an exhibition of Edward Burtynsky’s photographs. His large-scale pictures of industrial sites intrigued me. Looking at these richly coloured and exquisitely detailed man-made landscapes, I wondered how it was possible that I was made to feel both awed and repelled at the same time.

Edward Burtynsky, Nickel Tailings #31, Sudbury Ontario, 1996.

Edward Burtynsky, Nickel Tailings #31, Sudbury Ontario, 1996.

What I was interested in were themes of corrosion, rust and decay. For this purpose, I would use a combination of precious and non-precious metals and play on the contrast between these materials. As well, rusted metals would introduce a variety of textures and some colour. This was quite a departure for me as my work tends to be more figurative with a narrative unfolding around some kind of personal element, such as a memory or a place. For this project, the starting point would be the materials, and the focus would be on forms and textures. It was time to rummage through my boxes of found bits and pieces, my “Cabinet of curiosities” as I like to call it (more on that in a later post, “Confessions of a Hoarder”).

A sampling of found metal objects from my "Cabinet of curiosities".

A sampling of found metal objects from my “Cabinet of curiosities”.


Here is what I selected: a piece of muffler, a section of metal strapping and a washer – all nicely rusted out, of course, and with tantalizing patterns and textures. I was drawn to the muffler fragment because of the pattern of small slots repeated all over its surface. The piece of strapping, with its pierced circles of alternating sizes made a strong visual statement. As for the simple washer, I thought it could serve somehow as a setting for a stone. Now, could I just let these strong shapes inform the rest of the rings? Certainly, I wasn’t going to let myself be intimidated by concerns such as wearability! On the other hand (pardon the pun), these rings had to be worn without inflicting too much pain to the wearer. The solution was to use a silver sleeve (the part through which the finger could go comfortably), and to attach the found metal pieces to it. But how would I join the rusted steel pieces to the silver component? Soldering was not an option, so it would have to be cold connections, such as rivets or staples.

Dominique Bréchault, "Spilt". Ring, 2014. Silver, synthetic stones, found washer, patina. Cast, fabricated, stamped.

Dominique Bréchault, “Spilt”. Ring, 2014. Silver, synthetic stones, found washer, patina. Cast, fabricated, stamped.

For “Spilt”, I cast the shank of the ring in silver. Thick and wide, and darkened with black patina, it accentuates the industrial feel of the piece. A dome has been soldered to the top at a slight angle, as if about to “spill” out its contents (a green tube set cubic zirconium visible through the opening of the washer). The rounded silver tabs joining the washer to the silver dome contrast with the rough rusted texture.

Dominique Bréchault, "Exhausted". Ring, 2014. Silver, found muffler part. Fabricated.

Dominique Bréchault, “Exhausted”. Ring, 2014. Silver, found muffler part. Fabricated.

“Exhausted” is a wide silver ring wrapped with a fragment of rusted muffler. As simple as that seems, the difficulty here was to bend the fragile piece of crumbling metal without breaking it, and then to attach it securely to the silver band. I soldered silver wire posts onto the ring and bent them through the slots of the muffler to hold it in place. A thick section of silver plate, with an irregular side to echo the frayed edges of the muffler, holds one end of the wrapped piece in place.

Dominique Bréchault, "(W)holed". Ring, 2014. Silver, copper, cubic zirconium, found perforated hanging strap. Fabricated.

Dominique Bréchault, “(W)holed”. Ring, 2014. Silver, copper, cubic zirconium, found perforated hanging strap. Fabricated.

In making “(W)holed”, I wanted the strapping to be the focus of the work as I felt it was so visually striking. Again, the challenge was to connect this large piece of rusted metal to the silver ring, and not only physically, but visually as well. The strapping is held in place by two thick strips of silver soldered to the shank – a tension setting of sort. Pierced holes laid out in a regular pattern on the double-layer silver ring mirror the holes in the strapping. A small white cubic zirconium lights up the deep dark rusted tones of the top of the ring.

All found metal components were sprayed with Krylon®, a clear matte sealer ideal for protecting these types of materials without being too obtrusive.

IMG_2957 (2) (1024x768)

The show is now over and, reflecting on the process of making these rings and the challenges I faced, I can appreciate how far out of my comfort zone I wandered. In fact, I am feeling quite adventurous again, so much so that I started working on a submission for another upcoming show. This time I will be making a series of brooches, and exploring new themes and materials. I will keep you posted on my “travels”.


“Chihulys” on the Beach


Long Beach, Pacific Rim National Park, British Columbia

Long Beach, Pacific Rim National Park, British Columbia

One of the artists I admire the most is Dale Chihuly. He is famous for his monumental glass sculptures that have been seen all over the world, from Tacoma to London and from Las Vegas to Jerusalem.

Dale Chihuly, Rotunda Chandelier, V&A Museum, London

Dale Chihuly, Rotunda Chandelier, V&A Museum, London

We are lucky enough here, in Vancouver, to have one of his installations, “Persian Wall”: a large bunch of oversized flowers in rich, saturated colours, enclosed in a glass wall outside of a residential building.


D.Chihuly, Westbank Persian Glass Wall, Vancouver, BC

Dale Chihuly, Westbank Persian Glass Wall, Vancouver

Chihuly’s work, whether large-scale or more intimate, such as his bowls and vessels, always makes me truly happy. The forms he creates, largely inspired by nature, feel both familiar and otherworldly. They are comforting, moving, uplifting, and awe-inspiring, all at the same time.

A few weeks ago, just before the start of the school year, I went to Long Beach, in Pacific Rim National Park, on the West coast of Vancouver Island. Wild, isolated, and breathtakingly beautiful (yes, literally, as it is often quite windy), it is my favorite getaway. And as the longest beach on the West Coast of Canada, it always offers plenty of “treasures” for the dedicated beachcomber that I am.

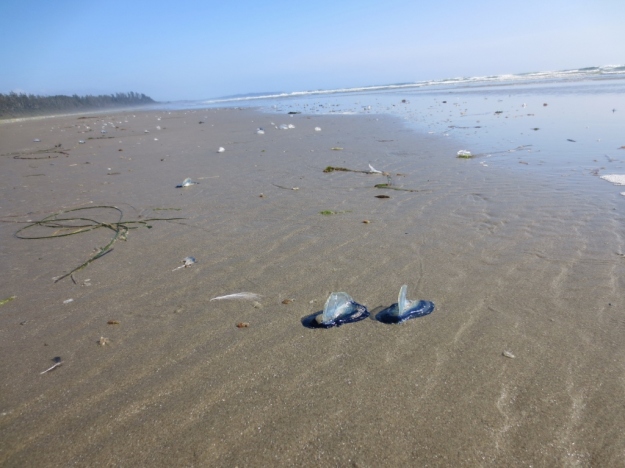
By-the-Wind-Sailors, Long Beach (August 2014)

By-the-Wind-Sailors, Long Beach (August 2014)

This visit, I saw the strangest and most fascinating of creatures. Was it even a “creature”? I wasn’t sure until my trusty Audubon Society nature guide book*, told me it was indeed one – a sort of jellyfish – poetically named “By-the-Wind-Sailor” (Velella velella).

Out-of-the-Wind-Sailor (Vellella velella)

By-the-Wind-Sailor (Vellella Velella)

And as I kept walking, I saw a lot more of them, an entire “flotilla” in fact – their single translucent sail catching glints of sunlight as they floated gently on the surf. Their bodies were electric blue, as if emitting their own light, and also ultramarine, navy and even midnight blue. Some had sailed too close to the beach and, having been left behind by the tide, had run aground. Like tiny ghost ships, they were slowly fading away, the rich hues changing to soft pastels, and eventually to diaphanous whites.

IMG_2831 (2) (1024x767)


IMG_2856 (1024x768)

I could not help but think of Chihuly’s magnificent Seaform series. I am sure that these By-the-Wind-Sailors played a part in his inspiration but how he transformed the glass into elegant flowing forms is extraordinary. His masterful technique allowed him to push the material to its limits, and to stretch it to create ever so thin undulating forms that still hint at the wave movement, as if they just came from the sea.

Who knew I would find “Chihulys” on the beach?


Dale Chihuly, Azure Seaform Pair

Dale Chihuly, Azure Seaform Pair, 2011


Dale Chihuly, White Pearl Seaform Pair, 2012

Dale Chihuly, White Pearl Seaform Pair, 2012

For more information about Dale Chihuly and his work, please visit his website.

National Audubon Society’s website

* National Audubon Society Nature Guides, Pacific Coast, Knopf, 1985.

pacific coast guide


“Meanwhile in San Francisco”

Illustration by Wendy MacNaughton, courtesy of The Atlantic.

Illustration by Wendy MacNaughton, courtesy of The Atlantic.

In my last post I was lamenting about being stuck in the creative doldrums. I decided to turn to drawing which had cured me of many ailments before, and after only a few weeks of daily drawing exercises, I noticed a slight improvement: a connection had been made. A few more weeks later, I am happy to report that I was able to finish three new pieces that I submitted to an exhibition (more on this later).

So drawing has been on my mind and in my life lately – in a big way. When I found in the July-August issue of The Atlantic, a review of Wendy MacNaughton’s newly published book Meanwhile in San Francisco (Chronicle Books), I knew this wasn’t just a mere coincidence, there was serendipity involved, and I had to share it with you.

In her review, Sarah Yager describes Wendy MacNaughton’s process as she creates what she calls her “illustrated documentaries”. MacNaughton, an illustrator based in San Francisco, spent several years documenting the lives of people in her city. She explains how she was “capturing subjects on the move, drawing without looking down, using her pen not just to express but to observe.” Her self-portrait above shows her drawing “in the field” (Note the pocket full of used pens. Now that’s dedication!). Her sketches depict street scenes and people from various communities around the city. I admire not only her dedication, but her drawing style as well. Her lines are both relaxed and descriptive; I love that she manages to keep them fresh and expressive. She also records snippets of dialogue, and often with a touch of humour. This is what Wendy MacNaughton says about drawing: “Drawing, for me, is this vehicle to look. It forces me to slow down and pay attention to things that I might not otherwise notice.”

I could not have said it any better.

Here‘s the link to Wendy MacNaughton’s website.


The Cure for (almost) everything

Last week a bird flew into the window. I drew it before giving it a proper burial under the cherry tree.

Last week a bird flew into the window. I drew it before giving it a proper burial under the cherry tree.

The last nine months have been quite intense. Starting a new job and dealing with a grueling schedule has meant almost no time for creative work. Now that the school year is over, I want to devote more attention to my own projects again, namely three pieces that I intend to submit to an upcoming show. The truth is, I am desperately looking for ways to reconnect with my creative side. Every teacher working in a creative field, dedicating time and energy to their students, ask themselves: How can I be truthful, and helpful to my students if I don’t live a vibrant creative life outside of the classroom? As artists, we want to freshen up our designs, and to keep exploring, and this requires sustained and undisturbed periods of time.

For this particular project, the themes I would like to explore are decay, corrosion and rust, using mostly non-precious metals or even non-metallic materials (in combination with silver). Visually, I imagine something in the spirit of Edward Burtynsky’s striking large-scale photographs of industrial sites and man-made landscapes. I know what I want to do, and yet I haven’t been able to design anything substantial so far. A fast-approaching deadline and the prospect of returning to my job in September (so soon!) add to the pressure.

Now, I may have been in this situation before. I always seem to forget when I am in the thick of it. But I do have a cure for this, and it is…drawing. Of course, we’ll all agree that drawing is a therapeutic activity that allows for self-expression, and that as such it is always beneficial to us, visual artists or anyone for that matter. When I was 9 years old and home sick in boarding school, I would confide with my trusty sketchbook and draw. When I was lost and lonely as a newcomer here in Canada, I would draw. When I was in a lot of pain – and afraid, stuck in a hospital for several months, recovering from a motorcycle accident, I would draw. Drawing has always been my salvation.

What I mean by drawing is not drawing with a specific project in mind, like the pieces I am trying to create, but drawing anything. I draw whatever is in front of me or whatever is in my head, doodles, life drawing, anything, and I draw often, no matter what. When I feel like an untethered balloon drifting away aimlessly, like I do these days, drawing is always the perfect remedy. This is why in the last few weeks I have decided to embark, once again, on a strict drawing regimen, filling several pages of my sketchbook every day.

IMG_1726 (2) (1024x769)

Tomato. Watercolour, pen & ink.

For me, the act of drawing – simply putting pen or charcoal to paper, moving my arm – is a truly tactile experience. As an artist, I feel compelled to explore and connect with the world around me, beyond just my feelings. In order to draw, to “see”, the subject, I must pause and focus. I need to be firmly grounded in the present. In the heavily mediated world we live in, with so many ways of removing ourselves from the immediate experience, slowing down and becoming aware of our surroundings is the first step for accessing our creativity.

The following are some examples of how I approach this. Please, be aware that these are simply exercises, not exhibition quality drawings, but I hope they’ll help illustrate and clarify my point, and show that you don’t have to be a Leonardo to benefit from this.

I like to draw early in the morning because I haven’t quite left the dream world and can still hang on to a few shreds of dream images.

IMG_1725 (2) (1024x768)

Flying Snake Docking Station. Watercolour, pen & ink.

I also like to draw late at night (I like to draw anytime really). Sometimes I draw what just happens to be in front of me. Any technique will do, charcoal, colour pencils, pen and ink, markers, whatever.

IMG_1734 (2) (1024x767)

Travel Plans. Pen & ink.

Sometimes I just doodle and draw whatever stories or characters show up on the page:

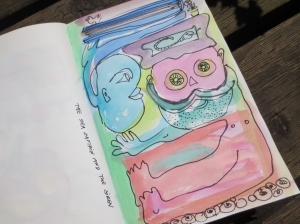
IMG_1728 (2) (1024x768)

The Sea Captain and the Siren. Watercolour, pen & ink.

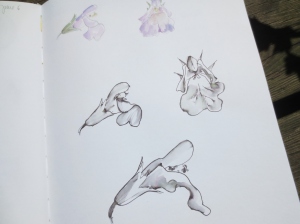
Sometimes I like to pick a simple object, a pebble for instance, a flower or something I have found on one of my walks, and to sketch it from every possible angle:

IMG_1738 (2) (1024x768)IMG_1719 (2) (1024x768)

Sage flower, “Parcel Rock”. Watercolour, pen & ink, pencil.

I also like to “deconstruct” my subject, not to emulate Picasso or Braque, but just to find out how it’s made and how the various components (volumes, forms) are articulated and fit together – a process actually similar to what I do when I design a piece of jewellery.

IMG_1730 (2) (1024x768)

Copper pan from Normandy. Pen & ink.

Even if I am drawing without a specific plan, I am still amassing shapes, forms, colours, patterns, textures, etc. This visual “reference library” has served me well in the past, many times over.


"Amour en cage" (Japanese lantern)IMG_1718 (2) (1024x769)

“Amour en Cage” (Japanese Lantern). Watercolour, pencil, pen & ink.


And yes, as we all know, in order to hone observation skills and improve hand-eye coordination, life drawing is crucial. When friends are not available, or my partner has run out of patience, there is always the cat. Sasha is not the easiest of models because he is not willing to sustain a long pose, except when napping, his “default” pose, which I have drawn way too often!

IMG_1723 (2) (1024x767)

Sasha napping. Pen & ink.


So, this is some of what I have done so far. I have been diligently drawing in my sketchbook, and enjoying it. As for these new pieces for the show, as I was saying earlier, I haven’t accomplished much at this point. And yet, a connection has been made; these daily drawings have served as a bridge to my creative side. I have taken a few steps, like collecting materials and making simple models – baby steps. I am hesitant to say anymore at this point. This connection still feels tenuous. Drawing is the cure, but I am not quite cured yet.

I will keep you posted as to what happens next, whether it is successful or not.

(All artwork © Dominique Bréchault 2014)

Going Green (and Blue)

IMG_1611 (3) (1024x768)

Bleeding Heart leaves in my backyard (Jewels courtesy of Mother Nature).

We are well into spring now. Days are getting longer, trees are greening and flowers are blooming. I always find this influx of renewed energy quite contagious. It makes me want to start new projects – something “new” and fresh, something well… green of course. But I also know this surge of optimism (and over-confidence?) is usually short-lived. As the last lilacs begin to fade, so does my enthusiasm. So, let’s get to it before I surrender to a “less colourful” work routine.

There are countless options available to metalsmiths when it comes to metal patination, especially with copper and brass. In a previous post, I shared a few simple recipes for creating red patinas on copper. This time, I will focus on greens and blues. And like last time, I have chosen basic recipes that can be used easily in a small studio, with limited equipment and common household products (vinegar, ammonia and salt).

Metal preparation is key. The metal must be thoroughly cleaned (free of grease and oil) to ensure the proper action of the chemicals. Pumice works well, but scouring cleaning products like Ajax or Comet, for example, will do the job. Once the surface of the metal is clean, avoid touching it (hold by the edges or make a handle with fishing wire).

Copper is best suited for this type of patina, although brass, a copper alloy, will work up to a point with much less dramatic results. Silver is only superficially affected by this chemical reaction, so it can be used in combination with copper and provide some contrast. In the following example, the silver solder inlay stands out in a copper piece with a dark green patina.


D.Bréchault - Spring Shower. Brooch. Copper, silver solder inlay, patina.

D.Bréchault – Spring Shower. Brooch. Copper, silver solder inlay, patina.


Spraying: The simplest method for producing a blue patina on copper is to spray ammonia on the surface of the metal, and let it dry outside in the sun for a few hours. If the metal has been textured, like in this photograph, the patina settles into the recesses of the texture and highlights the pattern. The cool blue patina is offset by the warm brown of the copper in the background.


Copper with stamped texture, ammonia (sprayed on).

Copper with stamped texture, ammonia (sprayed on). Sundried (3 hours).

To produce a wider range of greens and blues with a variety of surface treatments, two main methods can be used: the fuming method and the moistened method.

Fuming method: The metal is exposed to (not immersed in) the fumes of ammonia and/or vinegar. There are two options:

With Option A, you’ll need to drill small hole in the piece to suspend it in the jar with a fishing line (not metal wire). The piece can be re-cut later and filed to remove the hole. Allow at least 3 or 4 days or even more for the patina to develop, and to obtain richer tones.

Option B is more practical for coloring larger pieces or objects that can’t be suspended. As well, since the metal can be laid flat, it is possible to sprinkle salt on the surface. The action of the salt, combined with the fuming, creates patterns that add more interest to the coloring.


OPTION A: The metal is suspended in a glass jar by a fishing line, without touching the liquid. The jar is tightly sealed.

OPTION A: The metal is suspended in a glass jar by a fishing line, without touching the liquid at the bottom of the container. The jar is tightly sealed.


OPTION B: The metal is set beside a small container filled with ammonia, and placed in a larger tightly sealed glass container.

OPTION B: The metal is set beside a small container filled with ammonia, and placed in a larger tightly sealed glass container.

Copper. Ammonia and salt. 4 days.

Copper, ammonia and salt. 4 days.


Moistened method: With the moistened method, the metal is buried in moist medium.
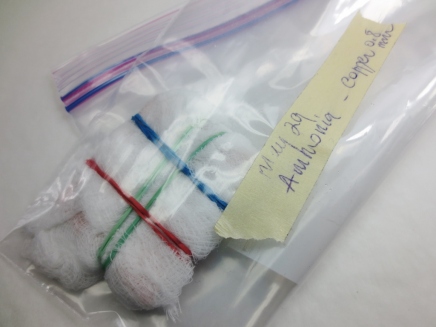
Metal wrapped in cheesecloth moistened with ammonia and tied with elastic bands, in a sealed plastic bag.

Metal wrapped in cheesecloth moistened with ammonia and tied with elastic bands, in a sealed plastic bag.

This truly fun technique allows the different mediums, moistened with ammonia or vinegar, to leave their own distinctive marks on the surface of the metal – this “etched” texture adds depth to the patina. The only drawback is the length of time it takes to achieve a rich colour, usually several days, a week or even longer. During this time it is important not to handle the piece, which would interfere with the process. But your patience will be rewarded!


Copper, ammonia, cheesecloth. 8 days.

Copper, ammonia, cheesecloth. 8 days.

Wrapping cheesecloth around the metal and attaching it with elastic bands creates a simple tie dye pattern:

Copper, cheesecloth tied with elastic bands. 8 days.

Copper, ammonia, cheesecloth tied with elastic bands. 8 days.

Cheesecloth, dried grasses, tobacco leaves, tea, wood shavings, cat litter (clay granules, wood or paper pellets – without additives), etc… each material will create a different “etched” pattern and rich shades of green or blue. Try experimenting with several mediums. The possibilities are endless, as long as the material is dry and absorbent enough, and untreated. For better results, the key is not to add too much liquid to the medium; it should be moist, not wet.


Copper, ammonia, cat litter (clay granules), 1 week.

Copper, ammonia, cat litter (clay granules), 1 week.

Generally, ammonia tends to produce more blues, vinegar, more greens, but results are not always easy to control as many variables can affect the outcome. The main factors: length of exposure, quantity of chemicals used, will make a difference, but there are other ones such as the type of medium, the shape of the object, the gauge of the metal used, the composition of the metal (for brass) and the temperature, that are not always easy to manage. Don’t forget to document your experiments. Keep samples and take detailed notes to be able to reproduce the colours you like.

Finishing: Pieces of jewellery with this type of patina should not be worn directly on the skin. Beeswax or a spray coating/fixative like Krylon can be used to seal and protect the surface of the coloured metal. Left unprotected, some of these patinas will continue to evolve:
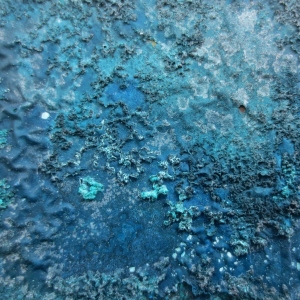
Copper, ammonia (fuming method). Unprotected surface.

Copper, ammonia (fuming method). Unprotected surface.

What I love about these techniques, beside the rich colours and painterly effects they offer, is that there is no right or wrong, as long as you keep your mind open to possibilities and happy accidents. Have fun with this, and who knows, this might help you sustain those boosts of spring energy and keep you motivated during the dog days of summer.

Recommended reading:

Patinas for Small Studios, by Charles Lewton-Brain, Brain Press, 2007.

Tips from the Jeweller’s Bench, http://www.ganoksin.org

And the recently published:

Patina – 300+ Coloration Effects for Jewelers & Metalsmiths, by Matthew Runfola, Quarto, 2014. (ISBN 978-1-62033-139-2)

This comprehensive guide on patinas explores in depth a large variety of coloration techniques, for different metals from steel to silver. It is very well organised, with detailed instructions and abundant colour samples.


Patina - 300+ Coloration Effect for Jewelers & Metalsmiths, by Matthew Runfola

Patina – 300+ Coloration Effect for Jewelers & Metalsmiths, by Matthew Runfola


I am very happy to add that two of my pieces have been included in this essential guide to patinas. Here is one of them:


D.Bréchault - "Water", bowl, copper, blue-green patina (fuming method).

D.Bréchault – “Water”, bowl, copper, blue-green patina (fuming method).


Safety reminder: Store chemicals in tightly sealed, clearly labelled containers. Avoid breathing ammonia fumes, work in a well-ventilated area or outside. Wear gloves and eye protection. NEVER mix ammonia and bleach (the vapors produced are extremely dangerous!).


The Machine Age

????

My last post “Being G. Moffat” lead to an exciting conversation about tools with some of you readers. Fellow blogger Stu’s passionate comments about his South Bend bench lathe and his milling machine inspired me to do some research on that company. I discovered that South Bend Lathe Works, founded in 1906 in Indiana, was the largest manufacturer of precision lathes in the world. In 1975 it became the largest employee-owned plant in the US. And another interesting fact is that they supplied their machines to 75% of schools and colleges in North America. That reminded me of a place where I once taught Continuing Ed. jewellery classes, at Vancouver Technical Secondary. 

Van Tech Metal Shop

Van Tech Metal Shop

The metal shop was located in a wing built in the 1920’s. I loved that it was a large space, brightly lit by tall windows and skylights, but what intrigued me was that it was filled with rows of mysterious machines, some of them clearly from another time, and most of them no longer used. I took a lot of pictures before I left, and then forgot about them. Now I wonder, was there one of these legendary South Bend machines in the Van Tech metal shop? I shall investigate.

Examining my pictures, looking for clues, brings me back to my university days, when as an archeology student I would clean and inventory hundreds of pieces of Roman ceramics. The cleaning part was really no more glamourous than washing a pile of broken old dishes, but the detective work was what I loved. What were these pots used for? Where did they come from? From what workshop? That was always exciting!

Archeology Lab - Universite de Poitiers, France

Archeology Lab – University  of Poitiers, France

But today, these are the artifacts I need to inventory: shears, grinders, punches, tube and pipe benders, hydraulic presses, rolling mills, and of course lathes and milling machines. And now too, I look at the shapes, colours, trademarks, anything that can help me get a better sense of the world they come from. Some are newer models, and some go back several decades, with peeling paint, dents and scratches left by many generations of students.


????????

DSCF7242 (1024x768)

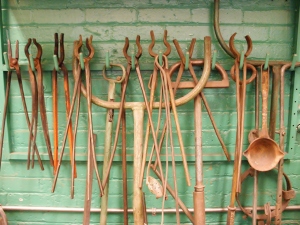
In the casting area, abandoned tools are so rusty that they really do look as if they came right out of an archeological dig, a bitter-sweet still life set against the proverbial institutional green walls.

????

Logos and names tell a story as well. These machines come from all over the world: England, Austria, Canada and the United States, to mention just a few. These machines are giants with intimidating names like “Invicta Major” that speak of national pride, and of a time when Western countries reigned supreme over their manufacturing empires and were thought to be invincible.

DSCF7183 (1280x959)????

????????

????

Today the reality is different. For the first time ever, for a student graduating from a five-year machinist programme, job prospects are declining as manufacturing jobs are leaving North America and relocating overseas. China is now the largest manufacturing country in the world, overtaking the United States only a few years ago.


Sadly and slightly surprisingly, I did not find a South Bend machine in my Van Tech metal shop photos. But stepping back, I see the bigger picture. This shop is a time capsule of a world that we may take for granted, but is surely fading away and may soon disappear. As an instructor teaching Metal Techniques in a Jewellery programme, I do believe in the value of the skills I pass on to the next generation of goldsmiths. But, what will their place and their role be in the new age we are moving into?


PS: For those of you who are not familiar with Stu’s blog, here‘s the link.


Being G. Moffat

1388 title photo copy

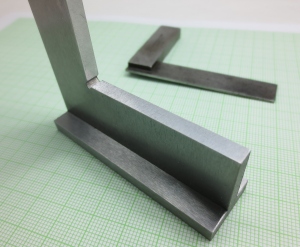
G. Moffat’s set square.

Is there anything more exciting that browsing through a tool catalogue? (Don’t answer that, it was a rhetorical question) Of course, the printed ones are the best kind as you can write on them and put sticky notes on your favorite pages, but I love them all. To me, tool catalogues are fun because tools are synonymous with possibilities.

Many years ago, when I was still a jewellery student, I was given an old set square
by a friend. It had been passed on to him when he was apprenticed to a
shipwright, designing and building wooden boats. I’ve always treasured it as a
symbol of our friendship and appreciated its beauty and elegance.

1381 e preston and sons copy (1280x960)1384 G Moffat copy (1280x960)

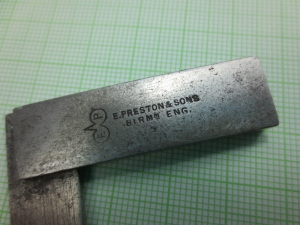
Its patina and slightly worn edges betray a long working life. And it is intriguing; it has a trademark logo with the letters “E P”, and “E PRESTON & SONS    BIRMM, ENG.” stamped on one side of the body, and on the other, a name, “G. Moffat” engraved in an old-fashioned cursive. The trademark, sometimes called the Bird’s Eye, is from Edward Preston & Sons, a tool manufacturing company that operated from 1825 to 1932 in Birmingham, England; catalogues from the early 1900’s can be found online. As for G. Moffat, I don’t know who he was – a machinist perhaps – but I’ve always felt connected to him, and through him, to the brother/sisterhood of metal workers.

1375 - german set square Copy1374 german set square detail copy (1280x960)

Fast forward a few years. I set up my own studio and gain more experience. I feel I can, with more confidence, set for myself higher standards of precision, and decide I am ready for a brand new made-in-Germany set square. Several years later, it is still as crisp as new and milled to perfection; when ultimate accuracy is required, that’s what I rely on. For goldsmiths, as with machinists, precision is essential, and our measuring tools – and set square – are always within easy reach on top of the bench. When you need a straight edge or a straight angle, or to check for squareness, place the blade of the square against the metal edge and put it in front of a light source. No light should shine through.

1376 both squares copy

But no matter what project I am working on, G. Moffat’s set square is always right in front of me on my bench, next to its German-made pristine, younger counterpart. Yes, its edges are a bit too soft, its surface pitted and worn, but it is smaller and lighter and fits comfortably in my hand. What it may lack in accuracy, it makes up with ergonomics. G. Moffat carefully and proudly engraved his name on his set square; that tells me that he cared for his tools and valued his work. It is a reminder of where I come from, the sum of skills, knowledge and experience accumulated by tradespeople who’ve come before me.

If any of you have stories about tools that are meaningful to you, please share in the comments section.

Charles Edenshaw

Charles Edenshaw with his engraving tool and a silver bracelet. Photo by Harlan Ingersoll Smith, c. 1890. Canadian Museum of Civilization. 88926

Charles Edenshaw with his engraving tool and a silver bracelet. Photo by Harlan Ingersoll Smith, c. 1890. Canadian Museum of Civilization. 88926

First, I would like to wish all of you a very happy and creative New Year. During the brief break I had between my two teaching terms, I was able to take in an exhibition of Charles Edenshaw’s work that I enjoyed very much. I intend to take my Jewellery Art & Design students there for an art history field trip in a couple of weeks, but I thought I would give you a short review of what I saw.

Charles Edenshaw (1839-1920) lived and worked on Haida Gwaii and was already well-known and recognized in his lifetime. He is considered the foremost Haida artist, a standout among Northwest Coast artists, and is internationally renowned. He left an important legacy, not only in his work, but through his descendants as well, such as his grandson Robert Davidson, an internationally acclaimed artist himself.

Charles Edenshaw Exhibition at the Vancouver Art Gallery

Charles Edenshaw Exhibition at the Vancouver Art Gallery

This exhibition, organized by the Vancouver Art Gallery (October 26 to February 2, 2014), is the first major survey of this incredibly prolific artist. Over 200 pieces are presented in a wide range of materials and techniques, including metal, wood, argillite, weaving, and carving. On display, are totem poles, canoes, transformation masks, model long houses, chests, platters, bowls, spoons, canes and, of course, jewellery.

Charles Edenshaw. Argilite platter.

Charles Edenshaw. Argillite platter. Pre-1899

Haida Gwaii Map

Rose Spit, Haida Gwaii. Photo: Royal BC Museum

Rose Spit, Haida Gwaii. Photo: Royal BC Museum

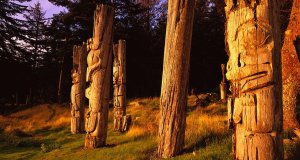
I had the opportunity to visit Haida Gwaii twice, a few decades ago. Back then, it was still called Queen Charlotte Islands. It was renamed Haida Gwaii (which means “Islands of the People”), to acknowledge its aboriginal origins, as part of the Reconciliation protocol between the Government of British Columbia and the Haida people. This archipelago, constituted of two main islands surrounded by over a hundred smaller islands, is located on the North coast of British Columbia, just south of Alaska. The overnight crossing from the mainland, 150 km on the rough open seas of the often stormy Hecate Straight gives a taste of how remote and wild this place is. It is home to pristine old growth rainforests and species that are found nowhere else in the world, and to astounding cultural artifacts, like Gwaii Haanas National Park Reserve and its totem poles. On both occasions I was taken not only by the wild beauty of this place, but also by the power and the spirit of the natural world. While there, everything was fodder for my imagination, I always had very vivid dreams, I often felt the urge to draw, to write or to make sculptures or jewellery. Each time, this creative energy fuelled me for several months afterwards.

Totem Poles at Ninstints, Haida Gwaii. Photo HelloBC

Totem Poles at Ninstints, Haida Gwaii. Photo HelloBC

Charles Edenshaw was remarkable in his ability to harness the spirit of Haida Gwaii, transform it and create magnificent works of art. The exhibition shows his evolution as an artist. We see him early on in his career explore European designs and iconography, and masterfully incorporate them in his work, surprisingly revitalized. We see him draw on his ancestral Haida traditions and stories to build his own distinct vocabulary of shapes and forms. Anyone who has been on the West Coast knows how powerful and exuberant nature is here. Northwest Coast Native art is highly formalized, as if Native artists want to bring some order to this chaotic world. Images are contained in strongly defined ovoids and S and U shapes that are organized into larger forms, all interconnected to fill the entire surface of the piece. Charles Edenshaw’s technique is precise and controlled, whether he is working in wood, argillite or metal. In his silver and gold work, his engraving is astounding. Hand engraving is a demanding technique that requires a lot of finesse and control; curved lines are the most difficult to achieve. In Edenshaw’s work, the lines, despite their precision and their control, are never rigid or contrived. Elegant curves flow, seemingly with ease, connecting the different areas of the design organically. Take for example his series of silver and gold bracelets which features themes that he revisits several times. Each individual piece, thanks to subtle details added or to different inflections of the lines, remains equally fresh and strong. They may be similar pieces, but not copies drained of their energy and spirit.

Charles Edenshaw. Silver bracelet. Photo : Vancouver Art Gallery

Charles Edenshaw. Dogfish bracelet, silver. Late 19th cent. Photo : Vancouver Art Gallery

Charles Edenshaw. Argilite chest.

Charles Edenshaw. Argilite chest. late 19th cent. Photo: Vancouver Art Gallery

As I wrote at the start, it is my intention to bring my students to view this show. Nothing can replace the actual experience of being in the presence of this artwork. We do have amazing technology that gives us easy and (mostly) free access to art anywhere anytime, but experiencing that art, just like the environment that inspires it, involves much more than just our visual sense.

Charles Edenshaw at work. Photo: Royal BC Museum, PN 5168

Charles Edenshaw at work. Photo: Royal BC Museum, PN 5168

Charles Edenshaw's engraving tool

Charles Edenshaw’s engraving tool