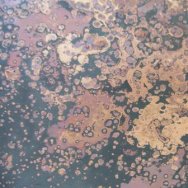
Automobile Junkyard on the North Bank of the Kansas River between the 12th and 18th street bridges. Kenneth Paik, 1973. Wikimedia Commons.
A few months ago, I wrote about the challenges of reconnecting with my creative side and working on three new pieces of jewellery I intended to submit to an exhibition. This post is a behind-the-scenes glimpse into my process and these challenges. Spoiler alert! I did meet the deadline and all three pieces were accepted in the show.
The first challenge was of my own making. I wanted to make rings; my previous projects had been mostly lockets and brooches, and I needed a change. Brooches would have been a more practical choice simply because they offer more space, a larger canvas so to speak, to express myself. But most of all, because brooches are not worn directly on the body, wearability issues are less constraining.
The theme of the show, “Beyond the Precious”, resonated with me because I had just seen an exhibition of Edward Burtynsky’s photographs. His large-scale pictures of industrial sites intrigued me. Looking at these richly coloured and exquisitely detailed man-made landscapes, I wondered how it was possible that I was made to feel both awed and repelled at the same time.
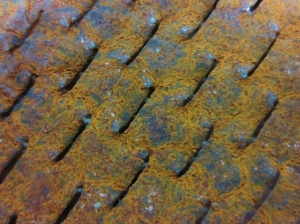
What I was interested in were themes of corrosion, rust and decay. For this purpose, I would use a combination of precious and non-precious metals and play on the contrast between these materials. As well, rusted metals would introduce a variety of textures and some colour. This was quite a departure for me as my work tends to be more figurative with a narrative unfolding around some kind of personal element, such as a memory or a place. For this project, the starting point would be the materials, and the focus would be on forms and textures. It was time to rummage through my boxes of found bits and pieces, my “Cabinet of curiosities” as I like to call it (more on that in a later post, “Confessions of a Hoarder”).
Here is what I selected: a piece of muffler, a section of metal strapping and a washer – all nicely rusted out, of course, and with tantalizing patterns and textures. I was drawn to the muffler fragment because of the pattern of small slots repeated all over its surface. The piece of strapping, with its pierced circles of alternating sizes made a strong visual statement. As for the simple washer, I thought it could serve somehow as a setting for a stone. Now, could I just let these strong shapes inform the rest of the rings? Certainly, I wasn’t going to let myself be intimidated by concerns such as wearability! On the other hand (pardon the pun), these rings had to be worn without inflicting too much pain to the wearer. The solution was to use a silver sleeve (the part through which the finger could go comfortably), and to attach the found metal pieces to it. But how would I join the rusted steel pieces to the silver component? Soldering was not an option, so it would have to be cold connections, such as rivets or staples.

Dominique Bréchault, “Spilt”. Ring, 2014. Silver, synthetic stones, found washer, patina. Cast, fabricated, stamped.
For “Spilt”, I cast the shank of the ring in silver. Thick and wide, and darkened with black patina, it accentuates the industrial feel of the piece. A dome has been soldered to the top at a slight angle, as if about to “spill” out its contents (a green tube set cubic zirconium visible through the opening of the washer). The rounded silver tabs joining the washer to the silver dome contrast with the rough rusted texture.
“Exhausted” is a wide silver ring wrapped with a fragment of rusted muffler. As simple as that seems, the difficulty here was to bend the fragile piece of crumbling metal without breaking it, and then to attach it securely to the silver band. I soldered silver wire posts onto the ring and bent them through the slots of the muffler to hold it in place. A thick section of silver plate, with an irregular side to echo the frayed edges of the muffler, holds one end of the wrapped piece in place.

Dominique Bréchault, “(W)holed”. Ring, 2014. Silver, copper, cubic zirconium, found perforated hanging strap. Fabricated.
In making “(W)holed”, I wanted the strapping to be the focus of the work as I felt it was so visually striking. Again, the challenge was to connect this large piece of rusted metal to the silver ring, and not only physically, but visually as well. The strapping is held in place by two thick strips of silver soldered to the shank – a tension setting of sort. Pierced holes laid out in a regular pattern on the double-layer silver ring mirror the holes in the strapping. A small white cubic zirconium lights up the deep dark rusted tones of the top of the ring.
All found metal components were sprayed with Krylon®, a clear matte sealer ideal for protecting these types of materials without being too obtrusive.
The show is now over and, reflecting on the process of making these rings and the challenges I faced, I can appreciate how far out of my comfort zone I wandered. In fact, I am feeling quite adventurous again, so much so that I started working on a submission for another upcoming show. This time I will be making a series of brooches, and exploring new themes and materials. I will keep you posted on my “travels”.


